Saturday, June 22, 2024

Oh the Places You'll Go!

Last night's Craft Roulette had my head spinning, trying to figure out how I would get all of the parameters met. I slept on it and had more thinking time this morning. The parameters were:

Project: A Dude's Card

Colors: Dragons

Element: Basket(s)

Random: Chart


Here is my card first, and then I will explain what I did with the parameters. My card was inspired by Allison Frazier's use of this patterned paper and postage frames on Instagram. She is so creative and talented!


I made a new baby (dude) boy card using primary colors (that you would see in a baby book about dragons) The hot air balloon basket is carrying the little bunny and the calendar is the chart. I looked up whether or not a calendar is a chart and I found that since people add their data (dates, appts.) it counts as a chart. And the calendar on my card means all the days/months/years/decades of the baby's life that will fill up with experiences and travels.

Products I used:

La-La Land Crafts: Countryside Designer Paper Pack

Stampin' Up!: Everybunny stamp set (old)

The Greetery: Curio collage frame die

Waffle Flower: Calendar stamp set, Postal stencil

Prismacolor: colored pencils

Versafine: Onyx black ink

I fussy cut a piece of the patterned paper to fit behind two layered collage frame dies adhered together for thickness. I adhered the frames on top of the patterned paper.

I stamped the calendar and bunny/hot air balloon. Then, using a black marker, I colored and stamped just the balloon outline on red patterned paper because the balloon was originally drawn to be an Easter egg. I fussy cut the ballon and adhered it on top of my stamped bunny/balloon image. 

I colored the bunny, basket and balloon and fussy cut them. I popped this piece up on two layers of foam tape to look like they were in flight.

I fussy cut the calendar and decided where I wanted it to go. 

Using my computer, I typed up my sentiment, printed it, and cut it down to size. I placed it where it looks like the bunny is reaching for its future.

The ideas in the gallery already are just great that people from all over the world are sharing! Go take a look here.

On to my next project!

-Carol


Thursday, June 20, 2024

Carpe Diem

I just love these Altenew rowboat dies and saw that Sunday Stamps SSC337 In The Garden had these gorgeous colors this week, so I made this card for it taking inspiration from the five colors. Pretty sure these are a girls group of rowboat owners. LOL.


Products I used:

Altenew: Wooden Rowboat die set, Boat Adventures stamp set

My Favorite Things: Snow Swirls cover die

Ranger: Distress ink

Twine

Vellum

GinaK: White Fine Detail embossing powder


I just love the colors of this challenge. It was fun to find these colors in my stash and piece these rowboats together. I wanted to add a little something to them and thought of rope. It feels like summer to me and a place we go for a casual lunch and to hang by the water. I fussy cut the sentiment after heat embossing it. I am getting braver to heat emboss on vellum too, after all these years. I just needed to remember the anti-stick powder!

See you back here soon!

-Carol


Sending You Chill Vibes

I have been loving all the graphic/colorblock scenery die sets out there and decided to try to make something using dies I own already. For our lovely teammate Carol's Moodboard Challenge #732 at Just Us Girls I put together a scene inspired by the beautiful colors and the top left photo in the moodboard.


I used some My Favorite Things Sand and Surf wave dies I own and a circle punch. I also used a bird die from a Spellbinders Build a Summer Birdhouse die set. The sentiment is from the Riding By stamp set by Honey Bee Stamps and one of the cardstock sayings by Simon Says Stamp. I love a water view...it is so peaceful and calming to me. That's how I chose this scenery and the sentiment.

We hope you will like this very pretty moodboard and find things in it that make you want to create a card!

See you in the gallery!

Carol

Sunday, June 16, 2024

Happy Father's Day

Happy Father's Day and here is a card for my husband because he is always up for a cocktail by the beach. I pictured it to be more masculine but once I got going on the sun and drink I just went with the tropical colors.


I made this card for Craft Roulette a week ago where the parameters were:

Project: Holiday

Colors: Tropics

Element: Wheel

Random: Geometric shape


My take on those parameters are: Father's Day, tropical colors, the orange slice at the bottom is like the wheel Mary Gunn spins to choose the parameters each week and my shapes are circle (orange slice) and squares (ice cubes). 


The glass is cut from white sparkle cardstock and I ink blended the card background with distress inks. I used some cute little ice cubes for texture and a "real" ice cube feel. It was a fun make and he likes it!


Products I used:

Lawn Fawn: Beach Sunset Stencils, Zesty Lemon die set

Picket Fence Studios: Tropical Cocktail dies

Stampin; Up!: Teeny Tiny Wishes stamp set  (older)

Distress Inks

My Favorite Things: Ice cubes


Have a nice day whether you are celebrating a dad or not...hope you can relax with a nice beverage today.

-Carol

Saturday, June 15, 2024

Happy 4th!

My latest card, a rocker card, is for Craft Roulette Episode 219 where the Mary Gunn funn parameters this week are:

Project: Anniversary

Colors: Salad

Element: New

Random: Folded Corner


My take is the 4th of July being the yearly anniversary of our nationhood, red, blue and white colors of a strawberry/blueberry/banana fruit salad (and silver for the fork to eat it), new being my cocktail glasses and garnishes dies, folded corners on the other side of the rocker card (it has a front and back) where you can see the Happy Birthday America greeting on the back side that is kind of like the bunting pictured below it. 


I am entering my rocker card in the June My Favorite Things Challenge: Summer Lovin' Card Cue because I used mostly their products. I have made Christmas drinks in the past with just the Christmas garnish dies. I used these glasses and everyday garnishes for the first time on this card.


Products I used:

My Favorite Things: Long Stem Barware dies, Garnish dies, Christmas Garnish dies

Stampin' Up!: Star dies and punches on back, Happy 4th sentiment die

Patterned paper from my stash

Concord and 9th: mini ink pads

Holographic silver cardstock

Wink of Stella pen


It was fun making the drinks and embellishing them. I die cut the glasses and garnishes first, then ink blended and assembled them. 

I die cut a circle out of heavy white cardstock, then another smaller one out of star patterned paper. I scored the white circle in half, then cut and adhered the red star paper on the front half of the white one. I made a folding mechanism on the inside of the rocker card so it wouldn't slide apart and flatten.

On the back, I cut another smaller circle and stamped Happy Birthday America on the solid red side, then folded the corners of my bunting to show the stars on the other side. I punched/die cut some silver stars, then adhered this piece to the back of the rocker base.

This week's Craft Roulette was an easy one...thank you Mr. Wheel!

Have you made any 4th of July cards yet? It is coming for us quickly! See you soon.

-Carol


Thursday, June 13, 2024

Celebrate!

I recently had a two-day stamping session with two friends at my house. We talked, ate,  laughed, made card kits for each other to complete, and shared each others' die sets to cut out things we want to use in the future. This card came from that fun time.  I made it for our Just Us Girls Word Week Challenge #731 "Celebrate" this week.


Products I used:

Pixi Dust Designs: Ice Cream Sundae die set

Stampin; Up!: Celebration Time stamp set

Picket Fence Studios: A2 Pierced Blanket Cover Plate die

Concord and 9th: Mini ink pads

Mirror cardstock

White glitter cardstock


This card was mostly die cutting with some ink blending on the edges for shadow effects. My favorite element is the addition of sprinkles to the scoops of ice cream. It's a great way to make a celebration out of an every day dessert!

Join us with some sort of celebration card! We'll be looking forward to your creations in our. gallery.

-Carol


Friday, June 7, 2024

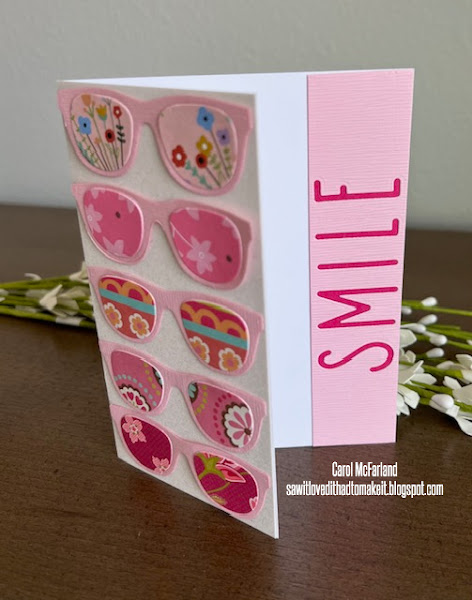
Smile

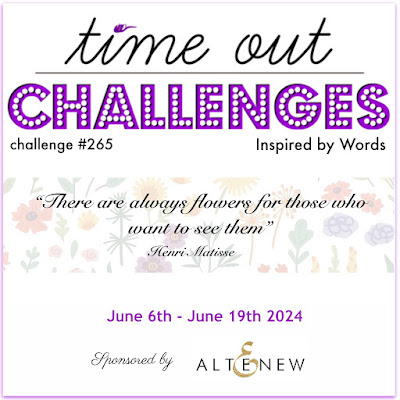
The Time Out Challenges #265 theme this time is Inspired By Words. The first quote below is the one they provided. I also thought about some other related ones: 

"There are always flowers for those who want to see them." -Henri Matisse.

"Smile and the whole world smiles with you, cry and you cry alone." - Stanley Gordon West.

I also thought about "looking at the world through rose colored glasses."

In the end, being a glass half full type of person is the gist of these words and my take away was this sparkly card.


Products I used: 

Concord and 9th: Bright Eyes dies

Alex Syberia: Fox Trot Alphabet die set

Patterned papers from my stash

White glitter paper

This card was just a lot of die cutting and arranging of the elements. I cut the front of the card off a little over an inch to show the sentiment along the side. I cut a strip of lighter pink cardstock, then die cut the letters into it. I put a solid piece of darker pink behind it for the letter openings so they would show up well. That's it!

I'm off to do chores that I avoided in order to make this card this morning...see you back here this weekend

-Carol

Thursday, June 6, 2024

A Colorful Pineapple

I am sure you have seen some of the colorful pineapples made using Spellbinder's Stitching Die of the month for May 2024. The fun, playful cards they are showing to inspire us are full of great color and details. I just received mine and decided that I had to make something with it for our Just Us Girls Color Week #730: Pink and Aqua. I am the hostess this week and it is my first time choosing hues for a color challenge. The team and our guest Jane Taylor have come up with all sorts of creative ideas for you using this pretty combination.

Also, we have created a longer timeframe for our challenges! Wednesdays at 6:00 pm EST will be our new ending time in order to give you another day to get your cards in the gallery! The Winner of the Week will be announced now on Thursdays, an hour before the new challenges open.


Products I used:

Spellbinders:  Stitched Die of the month May 2024

Sizzix: Tropical Leaves 3-D embossing folder

Sugar Pea Designs: Stitched rectangle die

Stampin' Up!: Classic ink pads

Pretty Pink Posh: Gems

Tim Holtz: Idea-ology Small Talk Stickers

DMC: Embroidery floss


I couldn't wait to die cut and stitch the pineapple. My favorite sample that Spellbinders has shown is a bright reddish pink, orange and yellow pineapple with a green crown. I went with light pink, then ink blended some Pixie Pink ink on it (to get an ombré effect) before I stitched. Then I found a piece of hot pink paper and die cut the front layer that goes over the stitched die cut.  

I cut the leaves from aqua cardstock, did a little bit of ink blending to make dark and light areas, then assembled the crown. I ran my Tropical Leaves embossing folder through my Big Shot with aqua cardstock, then attempted to spatter it with  Bermuda Bay ink. While it dried, I attached the crown to the pineapple. Then I ran the embossed aqua rectangle though with the stitched rectangle die to get a "border" on my rectangle.

I adhered everything to an A2 card base and finished the card with a few gems and a sentiment sticker.

We would love to have you join us with our pretty colors this week. They could work for a big variety of occasion cards. Hope to see you in the gallery!

Carol


Monday, June 3, 2024

Sea Ya Tropical Framed Card

This project started with an idea I have been wanting test out. It ended up working for a challenge that I want to enter. Inkspirational Challenges has a "Frame" theme this week and I purposely cut my inked panel smaller that the 5" x 5" card base I made so that I could frame my work. 


Products I used:

Altenew: Hibiscus Garden 3D dies

My Favorite Things: Wild Greenery dies

Lawn Fawn: Henry's ABCs dies

Gold cardstock

Distress Ink pads


So, I saw this technique recently on You Tube while looking for ways to get a glimmer foil affect without the machine. This is just die cutting using thinner gold cardstock/paper, adhering it to cardstock, then running it through the Big Shot a couple of times to get it flat on the background.

After ink blending and spritzing a 4.5" x 4.5" white panel with water, I die cut the tropical leaves and adhered them to the panel with Bearly Arts glue. I learned that you need to let the glue dry completely before running it though the Big Shot. I used a couple of thin shims to do so.

I die cut my letters twice, once out of coral and once out of the same gold used for the leaves. I adhered a gold letter behind each coral one for a shadow effect. Then I put them on a small blue scrap piece of cardstock. I popped it up on foam tape for the front of the card, and adhered "soon" inside the card with glue.

I am very much in tropical cardmaking mode now that summer is upon us. This is my favorite cardmaking time of year!

See you back here soon,

Carol

Sunday, June 2, 2024

Just For You

The Inspired By Challenge #IB291 is Muffin Cups. I see cupcake papers with pretty prints on them. And cupcakes come from cake batter, so that is how I arrived at my card for their challenge. I just had to run the patterned paper through my crimper for the cupcake papers texture. I also used polka dots and florals like their papers. 

I adore cupcakes, so this was a labor of love, in two senses of the phrase. The Inspired By three-square graphic also caught my eye, so I combined both picture and graphic into my card.


Products I used:

The Greetery: Postal dies, Takes the Cake Mini die set

Waffle Flower: Postal die

Stampin' Up!: Stamp, ink

American Crafts: Patio Party paper pad

Crimper

Foam tape


I used a couple of different die sets to cut my postage and even had to make the center one by partially die cutting one postage die, then die cutting it again to make it smaller than its actual size. I had fun using this mini cake die set and adding a gold cake plate and candles. You can believe me when I say I held my breath to stamp the sentiment, because it was the last thing to do to finish the card and it is an older wooden stamp that is easily stamped crooked. Whew...it turned out all right.

Now I'm off to busy myself with a few chores so I can stop thinking about cake and cupcakes. Yum!!!

-Carol


Saturday, June 1, 2024

When I saw this wooden boat die set for the first time I thought "summer" immediately. Summer begins in June! And Craft Roulette #217 on Friday ended up with these parameters:


Project: A2

Colors: French Café

Element: June

Random: Polka dots


My take on the parameters:

Project: A2 card size

French Café colors: See picture for colors (below)

June: Vacation

Random: Polka dots in the center of the two flowers on the left


Here is a French sidewalk café and below it are the boats I used for inspiration.


Products I used:

Altenew: Wooden Rowboat die set, Boat Adventures stamp set

My Favorite Things: Snow Swirls cover up die

Spellbinders: Mini Blooms and Sprigs dies

Pink and Main: Mum dies

Lawn Fawn: Woodgrain white cardstock

Ranger: Distress Inks

Pretty Pink Posh: Gems

Gold embossing powder

Glue dots (to hold the vellum sentiment to the card

Foam tape (to pop up the boat and some of the flowers)

Aqua vellum

This was my first time using the boat dies and it is pretty quick and easy. They come with a diagram for assembling them. I looked at cards on Pinterest using the boat die set for ideas. Since it is about dreams, the flowers can be out of proportion to the boat, right?

These parameters were easy and I had lots of ideas when I went to sleep last night. A fun episode too!

See you back here soon,

Carol