Saturday, January 28, 2023

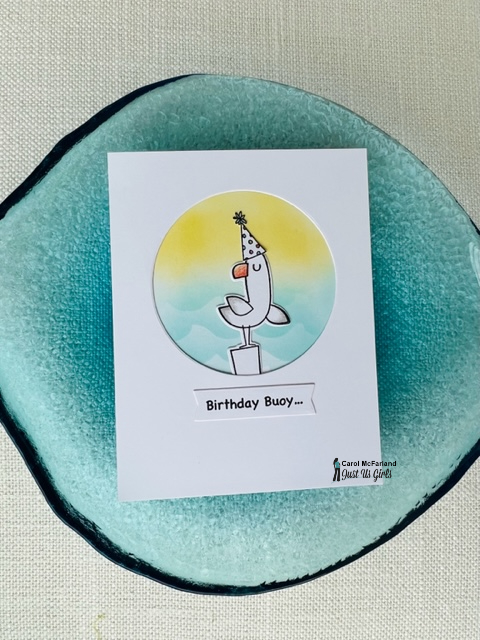
Birthday Buoy

My husband's birthday is coming up and he loves the beach. He is also the pun king, so I had to figured out how to make that happen on his card. I ended up typing the "Birthday Buoy" (Birthday Boy) on my computer and printing it out. The whole card was initially motivated by this week's Just Us Girl's Challenge #664 CAS Week - Birthday (another new theme!).  CAS is not my forté, so this will force me to practice it once a month and stretch my skills.


Products I used:

My Favorite Things: Seagull and inside sentiment, wave dies, circle die 

Pink and Main: banner dies

Stampin' Up!: Birthday hat, ink pads

Prismacolor pencils

Ink blending brushes

I cut two different wave dies on parallel edges of a piece of cardstock to create a stencil, then ink blended the water and sky straight onto the front of my white A2 card base. Next I die cut and stamped the seagull and hat, then colored them with pencils. I left the piling/post plain white (the thing that the bird is standing on) to look more like a buoy. I cut a 5 1/2" x 4 1/4" white panel and decided where the circle had to be to make an opening for my scene. I attached the seagull and his hat to the scene n my card front, then adhered the panel with the circle opening to the front of my card base. I typed and printed the sentiment, then cut it out with a banner die. When that was adhered below the window, my card was complete!

If you have ever taken food to eat on the beach, you know that you have to guard your food or a seagull will dive in and snatch it out of your hand...and chips seem to be a beach food that people often take with them. My stamp set doesn't have a chip stamp, and previously I have drawn one to go with this sentiment. I keep thinking I should have added a chip to the front or inside and may do that before his birthday. This is a fun stamp set with its seagulls and their different personalities!

Thanks for taking a look, be sure to check out all the fabulous guest (Thanks so much Jules!) and design team cards, and join us in the gallery this week...CAS cards take less work and time!!!

-Carol


Sunday, January 22, 2023

Did a Little Shopping

A Christmas present to myself in December was a few shopping die sets from Spellbinders...and I have more ideas for them coming up soon. The Color Throwdown #726 Challenge is to use Navy, Grey and White...and I thought that purses might look good in those colors. There is a great play on words for the latin phrase Veni, Vidi, Vici (I came, I saw, I conquered - Julius Caesar)...Veni, Vidi, Visa!! I came  I saw, I shopped! HA! I think I may even have an old wooden stamp that says this!


Products I used:

Altenew: grid die

Spellbinders: Shopping Spree dies/sentiment stamps

GinaK: white detail embossing powder

Assorted cardstock

Silver cardstock (for metal pieces on purses)

Versamark watermark ink pad

Since this is the first time using the shopping dies and stamps, I am playing over at NBUS #46 as well!

I used the grid die to look like you are in a store where they display/hang purses and other clothing items on a white grid. I couldn't wait to make purses with different colors and textures! (I plan to make more patterned multicolored ones soon!) Really fun! Also, I can't wait to use some of the other funny sentiments that coordinate with this die set!

Hope you are having time to play with your new or old stamping supplies this weekend!

-Carol


Saturday, January 21, 2023

Lazy Days

For our Just Us Girls Challenge #663 I chose one of our new challenge themes: Moodboard. I created it with the cozy, lazy indoor days of winter in mind. Our team ran with it and has lots of ideas to inspire you! You can go in so many directions like coffee or tea, cookies, rain/umbrella, florals, the colors, books, etc. Have fun!


Products I used:

The Greetery:  Cozy Cup stamps and dies

Concord and 9th mini ink pads

Patterned paper

Silver cord

Silver cardstock


This stamp set is not mine but my friend allowed me to borrow it and play with the different color schemes that are endless with it! I should break down and just buy my own set of these. I wanted to incorporate the book and the white background, with a little floral detail like the photos.

Join us this week! It is cold outside and you deserve some creative time!

-Carol


Saturday, January 14, 2023

Love you...

For our second Just Us Girls Challenge of the year, word Week #662, our teammate Sue chose Heart. I decided to make a shaped card this time with a little scene. I love my Jane's Doodles mouse!


Products I used:Jane's Doodles: Mouse stamp

My Favorite Things: heart stencil

Simon Says Stamp: Heart die, (CZ Design) sentiment stamp set

Distress inks

Blending brushes

Patterned paper

Grey cardstock

I decided to make a shaped card and cut out two hearts. I scored the back one about 3/4" in from the top edge and adhered it behind the front heart with red line tape for sturdiness. I burnished the back heart away from the front to make the "hinge" for the card to open and close.

I stenciled the hearts lightly all over, then masked the "ground" using a post it note to cover the hearts and just ink the bottom of the card.

I stamped the mouse image on grey cardstock (to avoid having to color/shade him) and then stamped the mouse and balloon again on patterned paper to give the shirt and balloon a "hearty" design. I fussy cut them and adhered them to the mouse. I popped up the balloon on foam tape to give it the look of floating. Last, I added pink to his ears with chalk.

It was a fun make!!! Hope you will join us this week with your "heart" cards!

-Carol


Wednesday, January 11, 2023

Ho! Ho! Ho!

We are back for the new year at Christmas Craft Creations with our first theme: Snippets! Scraps of paper are what we are using for our main feature on our cards and I chose some of my favorites from my stash. I saw an adorable card here on the There She Goes blog and had to CASE it! I did not want to lug out my sewing machine so I used my poker, stitch hole guide and foam piercing mat to make the "sewing" effect. I followed her directions for cutting the "rays" and making sure my patterned paper was going to be in the right direction (ie., not upside down). I realized after I adhered the circle with Santa on it that it should have been running off the corner like a sun and rays does, but I didn't want to cut off his foot! Oh well...he still makes the card fun!


Products I used: 

My Favorite Things: Jingle All The Way stamp set, Inside and Out Stitched Circle die set

Copic markers

Wink of Stella pen

Baker's twine

Verafine Onyx Black Ink

We hope you will join us this month...I am still in Christmas crafting mode and using some of my products that I didn't have time to use in December! It's also fun to grab your scraps/snippets and put them to good use!

See you in the gallery!

-Carol


Saturday, January 7, 2023

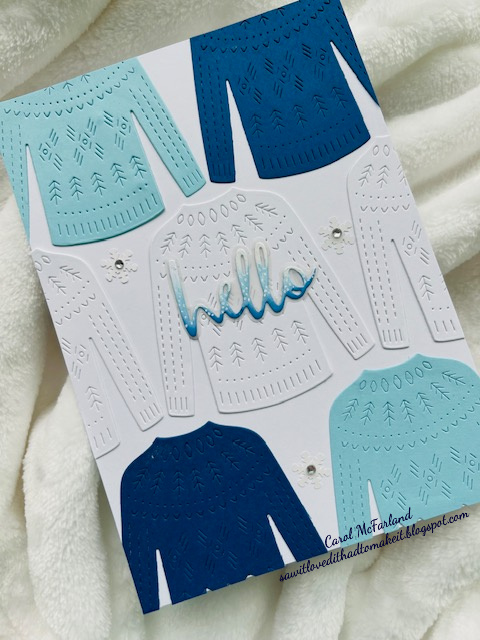
A Warm Winter Hello

I couldn't wait to use my Cozy Sweater die again, but this time for winter/ski season/sweater weather. For our first Just Us Girls Challenge of 2023, #661, Lisa K. chose the colors navy, light blue and white, which are colors I really like using. Here is what I came up with for this challenge. Please join us this week!!


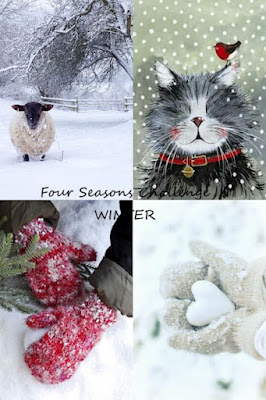
I am also entering it at the Four Seasons Challenge: Winter.


Products I used:

Ellen Hutson: Cozy Sweater Tag die

Ranger: Distress inks

Stampin' Up!: rhinestones and snowflake sequins

White gel pen

I die cut the sweaters out of the colors of our challenge, then tried some arrangements on my 5" x 7" panel. I adhered them, then cut off the excess that hung over the edges of my panel. I cut a second 5" x 7" panel and scored along one long edge at 1/4". I put red line tape along that same edge and adhered the front panel on top of it by butting them both up to the top left corner of my scoring board. The back panel folds away from the front panel along the score line to be able to open the card. (I had to do this because I only have 8 1/2" x 11" card stock for my bases, but would have needed 5" x 14" for a 5" x 7" card base.) Next, I found the Hello die cut and vellum shadow in my stash and ink blended the hello with blue inks for an ombré effect. I used a white gel pen to make falling snow on the word. Not sure if I like it...I was going for the winter look with the sweaters so I thought snow on the word might keep with the theme. Then I added the snowflakes and rhinestones and was finished!

We look forward to you playing along with us this week...it's an easy one! Check out all of the design team's ideas as well by clicking on their names above their cards!

-Carol

Wednesday, January 4, 2023

Baby, It's Cold Outside

Many people are having freezing temps now that it is January...I am not, but I lived in a snowy climate for many years and understand. I enjoyed snow most when looking out of the warm house at nature, especially when sparkly snow was falling. The Color Throwdown CTD724 challenge colors (grey, black, white and magenta) gave me the idea to make a pastel-ish card scene like you see in snowy climates. (The second picture shows how more white the snow is than the first picture...a hard one to photograph!)


I am also sharing this with the Four Seasons Challenge for their Winter theme.


Products I used:

Sizzix: Robins in Hats thinlits dies

Pretty Pink Posh: Winter Wonderland stamp set

My Favorite Things: birch tree dies, Inside and Out Stitched Circle dies

The Greetery: Postal die

Simon Says Stamp: Drifting Stitches Borders dies

White glitter card stock

Concord and 9th: mini ink pads in Dove and Cranberry

Ink blending brushes

Versafine: Onyx Black ink pad

I cut a circle mask out of a post it note and another in the middle of a larger piece of card stock. I put the card stock mask over my front panel and inked a little cranberry for the moon. Then I took the post it mask and put it over the moon to ink blend the dove colored sky. I added the birch trees and glittery snow piece that I cut with the stitched border dies, then cut the postage rectangle for the scene to be complete. I added my little bundled up birdie and stamped the sentiment. I popped my completed panel onto a white, A2 card base. Done! 

See you back here soon with more winter fun,

-Carol