Saturday, August 27, 2022

Back to School Teacher Card

Since I was a teacher my whole life, I have many teacher friends. I think of them when school starts because every year there are new stresses and harder issues. I thought I would dedicate my Just Us Girls #647 Challenge: Back to School Card to a math teacher friend of mine. We worked together at a difficult school but we kept our sanity by getting together outside of school to have lunch out and take our time eating! (We had 25 minutes from the time the kids left for lunch until we were teaching again.) 


I decided to make an asymmetrical card for a change (sort of geometric for a math teacher) and chopped off half of the front of the card base. Then I matted the card inside and out with patterned papers that look math-related. I stamped my image and colored it with markers. I matted the image with card stock and attached it to the diagonal card front. Easy!! I wrote a message to her in the white area of the inside left panel of the card.

We hope you will join us this week with Back to School cards...maybe for a student, teacher, aide, cafeteria worker or bus driver? They all need our support and believe me they appreciate the thought!
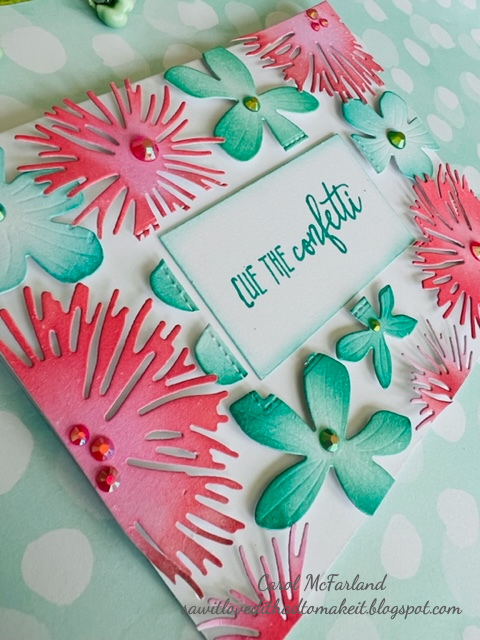
Products I used: 

Stamp: American Art Stamp: Teacher

Markers: Stampin' Up!

Various patterned papers and card stock

Ink: Versafine Archival Onyx Black


Hope to see your school-related cards in our gallery! 

-Carol

Wednesday, August 24, 2022

Shop 'til You Drop Birthday Card

The Simon Says Stamp Wednesday Challenge: Shimmer and Shine caught my eye this week. I love this gift bag die and its little handles and tag, and need to use it more often. I also knew that I had a sentiment or two somewhere that had to do with shopping, so I started looking through my stash, grabbing gold this and that to add to the card. Here is the card that resulted.


Products I used:

Waffle Flower: Flat bag die

Sugar Pea Designs: Card Front Elements Builder

American Crafts: Patio Party patterned papers

Pink and Main: Sequins

Foam tape

Gold tissue paper

Gold Card stock

My Favorite Things: Sentiment

Versamark watermark ink

Gold embossing powder

Vellum

Adhesive tape (to attach the tissue paper to the bags on the back)

I decided that I wanted to incorporate gold as much possible without being over the top. I found a little pad of patterned papers, some with gold details, and was delighted to discover that the top of each little page had a little strip of one of the other patterns on it. I took advantage of that and cut my bags with that part of the sheet. It is fun to put the bags together, fill them with items, and in this case, I just used gold tissue paper. I used gold card stock for the handle on one bag and the tags on three. I  popped them up a little for a more realistic looking bag! I didn't want the sentiment to cover the bags too much so I chose vellum and heat embossed the wording with gold powder.

Now that I made this "gilded" birthday card, I have an example to CASE myself in the future!

See you soon,

-Carol


Monday, August 22, 2022

Message in a Bottle

The Paper Players Clean and Simple Challenge PP605 is everything and anything Nautical. I wanted to try something a little different and looked around for something that caught my eye. I CASEd a 2016 post from JJ Bolton here that I thought was fun.


I love a beachy scene and this one evolved as I worked on it. I adhered my wave patterned paper to the front of an A2 card base. I stamped my bottle on the front of the card base, then hand cut it out a little bigger than the image (I don't have the bottle die). Next, I stamped the bottle on a piece of white card stock, then cut a tiny stencil for clouds. I also used the stencil upside down for the waves! I cut the bottle by hand so it would be easy to place in the opening on the front of the card. I die cut my boat and mast out of wood grain card stock and adhered it to the stenciled bottle. I die cut the sails and popped them up on foam tape, then drew the birds in the distance with a black pen. I knew I had a tiny tag stamp, and after I stamped it I wrote the message on it.

It might look like a lot of work, but it really wasn't. I had the card I was CASEing to look at and my stash to pull from. I was a fun make!

Products I used:

Memory Box: Marina Sailboat die

Flora and Fauna: Bottle stamp

Recollections: Jar and tags stamp set

Prismacolor: colored pencil (cork)

Versafine: Black Onyx ink

Stampin' UP!: classic ink

Blending brushes


Hope you can still enjoy summer a little longer where you are...I am hanging on as long as possible!

-Carol


Saturday, August 20, 2022

Beach Bungalow

I got these dies earlier in the summer and have decided it is finally time to play with them. This beach bungalow set has lots of tiny bits and pieces, but they are easy to use and the end result is a fun scene. For our Just Us Girls #646 Color Week Challenge we are using Teal, Yellow and Tan. Check out all the fun ideas the team has for you. I am also entering it at the My Favorite Things Wednesday Sketch Challenge MFTWSC607 here.


Products I used: 

My Favorite Things: Beach Bungalow die set

The Greetery: Postal Dies

Spellbinders: Build a Summer Birdhouse bird die

Distress Ink

Blender brushes

The hardest part of using these dies is deciding which colors/patterns to use! Our JUGS Color Week Challenge made it easier for me. There are lots of ideas for using this set all over Pinterest. 

I really wish I could stay as close as my little bungalow to the beach or in one of those bungalows that are out over the water. Maybe one day...


Well, we hope to see you in the gallery this week! Please join us!

-Carol

Thursday, August 18, 2022

Congrats to the Newlyweds

My daughter was recently the maid of honor in her friend's wedding and I made a card from our family. It was a labor of love, pun intended, and I spent a long time thinking about it and executing it. There was a special die set that I wanted for it, but I already had the car die set so I couldn't justify getting the set that is bigger and has all the car and wedding couple in it. I did buy a different set (on sale) for the people/flowers and made it work. Now is the time that it fits a challenge to be able to post it! Our Tic Tac Toe Challenge #175 middle row across: embellishments, die cuts, leaves is the row I chose...what do you think?


I cut the front and back of the car from the one die I have, then cut my own grill, insignia and tire for the back of the car. I constructed sides that helped the car both be 3D and be able to lie flat for the envelope. I cut another car piece to put behind the couple to hide the workings of the card. I made the bride and groom look like the real ones as well as her veil and flowers. I knew she had pearls all over her veil, so I bought little heart shaped ones and added them to mine. I put the I (heart) You inside the back of the car since the spare tire was covering where the license plate should be. I had to custom hand cut their hair styles and his suit.

Products I used:

Spellbinders: Sunday Drive die set, Sunday Sunset die set

Tulle

Heart shaped pearl embellishments

White sparkle card stock

Silver card stock

Acetate for windshield

Various card stocks in different colors

The bride loved it and that is all I needed to hear. Her engaged bridesmaids told my daughter they might want one too! It was a lot of work, but worth it in the end. 


Hope to see you in our gallery!

-Carol


Hi My Fabulous Friend

I was intrigued when stitching on card stock first came about but I resisted...I had my cross stitch period long ago and wasn't sure I wanted to add it to what I have going on now. But the recent Spellbinders stitched alphabet lured me in. I started with the two letters you see here...and I know they won't be the last! It takes just minutes to complete the stitching part! The third picture below is an example of two of Yana Smakula's cards using these letters. I am using this card for this week's Tic Tac Toe Challenge #175: middle row left to right...embellishments, die cuts, leaves.


Yana Smakula's samples


Products used:


Spellbinders: Stitched Alphabet dies, Artful Tulips die set

DMC floss

Rhinestones

Stampin' Up!: sentiment, Classic ink pad

Color Wheel

I die cut the letters three times out of Stampin' Up! regular weight white cardstock and glued them together for sturdiness. (Yana Smakula suggested two of each letter out of thick cardstock.) I used 6 strands of floss but I think 4 might be better. I also used a color wheel as she suggests to pick analogous colors from it...the ones beside each other...because they go well together since they are similar (in addition to white, a neutral).

I am anxious to make more projects with these dies! I am contemplating Christmas projects with more of these dies. It's really, really fun to stitch them!

Have you joined this technique?!! Many stamp companies have stitched options now!

-Carol


Monday, August 15, 2022

Summer Wreath

Earlier this summer I saw this idea of a wreath with summer elements attached and have been wanting a reason to try it. The Timeout Challenge #220 Make Your Own Background caught my eye and this is what I created. School may be back in session but the season is still summer!


I took a panel of white cardstock and lightly ink blended with distress inks. Then I stenciled tropical leaves more heavily with the same colors. Last, I moved the stencil all over as I stenciled the leaves here and there with white (Picket Fence) distress ink to get a layered look. If you look closely you can see the white stenciled layer over the rest of the leaves. It is a bokeh technique that I use sometimes with different shapes each time. Finally, I die cut the panel to get the wavy stitching. Here is a good tutorial for bokeh technique.

I die cut several types of tropical leaves and arranged them in a circle to make a wreath. This took a long time to satisfy the picture in my head. Then I die cut the flip flops, sunglasses and sun with colored cardstock and arranged them in all together at the bottom of the wreath. I added a few jewels and a bow to finish it.

Products I used:

Ranger Distress Inks

Simon Says Stamp: wonky rectangle dies

Monstera leaves stencil

My Favorite Things: tropical leaves dies

Waffle Flower: Go Girl dies (sunglasses, flip flops)

Sizzix: summer elements dies (sun) 

Jute cord

Pretty Pink Posh: jewels

See you back here later this week!

-Carol


Saturday, August 13, 2022

Warm Christmas Wishes

It is Trend Week at Just Us Girls Challenge #645 and we are using stencils!!! This pair of (surfboard) stencils makes a quick and easy background that really adds a lot to a card. One stencil does the surfboard itself and the other adds the details. So fun! And the best part...now I have another Christmas card ready for December!


Products I used:

Jane's Doodles: Surf's Up stencils

Sunny Studio: Surfing Santa

Reverse Confetti: Circle die

The Greetery: Postal die

Circle punch

Stampin' Up!: markers

Prismacolor pencils

Nuvo Crystal Drops

Wink of Stella pen

Distress inks

Blender brushes

Foam tape (for dimension behind Santa)

Simple card after stenciling the background. Santa's beard and hat have sparkly Wink of Stella on them and the Nuvo Crystal Drops add more splash to the scene. A few bloopers along the away making this card. Nothing new! We hope you will make a card using a stencil and put it in our gallery this week!

-Carol

Wednesday, August 10, 2022

Jolly Flamingos

For the Christmas Craft Creations August theme our theme is Winter Activities! I know that not everyone lives in a warm climate like I do, but I thought that it might add variety to the design team cards for inspiration. Here is my ice skating, decorating trio for you.


Products I used:

My Favorite Things: Festive Flamingos

Cuttlebug: embossing folder

Copic markers

Unknown source sentiment die

White glitter card stock

We hope you will join us with your Christmas winter activity cards! Think of skiing, playing in the snow, Santa on a surfboard, cookie baking, wrapping gifts, decorating the Christmas tree. Many possibilities!

See you in the gallery!

-Carol

Sunday, August 7, 2022

Get Well Wishes

A cat loving friend of mine just had knee surgery and I decided to make a get well card that would make her laugh. A while back my husband had surgery and I made a dog with a cone card, so I knew what I was going to do for this cat version. I am playing along with NBUS #41 (Never Before Used Schtuff) with this cat stamp.


Products I used:

Cat, sentiment, ribbon: Stampin' Up!

Cone: vellum and a mini brad

Frame: Avery Elle

Foam tape


I punched a half circle out of vellum and kept cutting off more and more of the straight edge until the cone would fit the cat. I secured it with a little brad. Everything else is easy and obvious. I can't wait to hear from the recipient of this card!!!! Here is a link to my original dog in a cone card from 2021. My husband laughed out loud when he saw it because he was wearing a neck brace at the time after his neck/spine surgery and I was calling it the cone of shame.

Hope you are enjoying your weekend,

-Carol


Saturday, August 6, 2022

Butterflies

This week at Just Us Girls Word Week #644 we are all about Butterflies! You have to see all the pretty cards! Be sure to click on the link above and check them out! My mini slimline card ended up looking like a baby girl card, so I am leaving off the sentiment for now, in case I need to add a name to it with little letter stamps or dies. Baby cards are fun to create. Simple and sweet.


I wasn't sure I had any butterflies in my stash, but then I remembered that I had a punch. I ran some white card stock and an embossing folder through my Big Shot to get the scallops on it. Then I punched out three white butterflies.  I also punched out a butterfly in the middle and two ends of a strip of pink floral and bee patterned paper. I popped up the butterflies' wings with foam tape in the spaces where the butterflies were cut from the patterned paper. I love this cute floral and bee patterned paper and like it with the butterflies. I added a yellow striped border and some sequins to finish it off!

Products I used:

Stampin' Up!: butterfly punch and scallop embossing folder

Patterned papers

Sequins

Here are some other baby cards I have made in the past. They are quite simple to make.


We hope you add some butterflies to our gallery this week. See you there!

-Carol


Thursday, August 4, 2022

Cue the Confetti

Thanks for stopping by! Our new board for the Tic Tac Toe challenge TTTC173 is a birthday theme! I chose the middle column moving down: Frame it, Birthday, Free...and I used a Jennifer McGuire technique found here called Floating Die Cut Frame. Can you see the stitched rectangle opening in the center of the card? The flowers are popped up on foam tape, hence, floating.


I die cut my flowers until I thought I had enough to cover a 4 1/4" x 5 1/2" panel. Then I ink blended them in aquas/teals and pink/corals. I followed Jennifer's tutorial, then chose a sentiment. I stamped my sentiment and cut it into a rectangle that fit the center of my frame perfectly, then brushed teal ink on the edges. I could have just stamped it on the card, but I wanted to define the center rectangle shape to make it more obvious. I added jewels and my card was complete!

I hope you will join us this week in the gallery with a birthday (or other) card using this festive board!

Products I used: 

Papertrey Ink: Into the Blooms II dies

Distress Inks

Stampin' Up!: Picture Perfect Birthday stamp set

My Favorite Things: Inside and Out Stitched Rectangle dies

Pretty Pink Posh: jewels

Foam tape

Press and Seal

Ink blending brushes

-Carol