Thursday, March 31, 2022

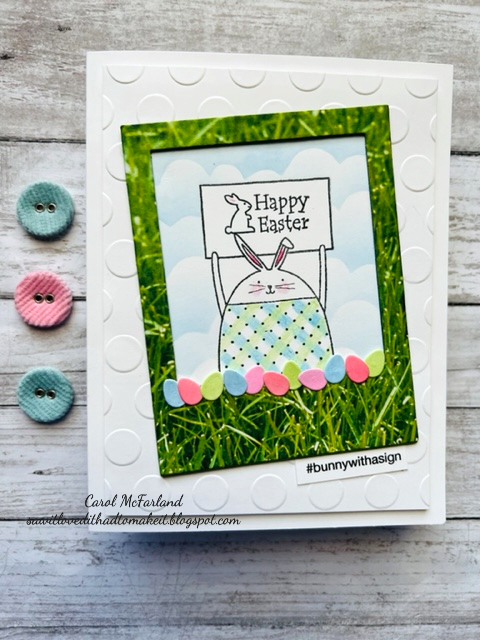
#bunnywithasign

I hope you are familiar with the Facebook and Instagram accounts named dudewithsign and dogwithsign? I thought of these accounts when I grabbed this bunny stamp for my card. As soon as you see these accounts you will get why I made the hashtag for my card. Our latest Tic Tac Toe Challenge Board #155 is a lot of spring fun! I chose the center column top to bottom: Embossing, Rabbit, Patterned paper. (It also fits the bottom row left to right: Die cut, Patterned paper, Green.)


#dogwithsign


#dudewithsign


Products used:

Stampin' Up!: Cheerful Critters stamp set and circles embossing folder

Waffle Flower: Go Girl Winter die set (Poloroid die)

Hero Arts: Easter sentiment

Spellbinders: Hoppy Sunday Drive (egg dies)

Hashtag: computer generated

Prismacolor: colored pencils

Cloud Stencil: hand cut

First, I popped up the embossed circles panel I made on foam tape. Then I cut three Poloroid frames (one being grassy patterned paper) and adhered them together to be thick like the real ones. I stamped and then masked off the bunny and his sign so I could stencil my clouds. I colored the bunny with pencils, then ink blended white card stock in four ink colors so I could die cut the eggs. That's about it! Hope it made you chuckle!

-Carol


Wednesday, March 30, 2022

Relax

The Freshly Made Sketches 529 inspired me to make what I envisioned to be a zero edge pool on top of a high rise near the ocean. Don't ask me why I pictured this kind of a scene, but some new dies I recently got may be at the root of it all!


Products I used:

Ellen Hutson: Everything's Beachy stamp set (umbrellas and sentiment)

Simply Graphic: Les Nageuses (Swimmers in French) die set

PinkFresh Studio: Diagonal Stitched Rectangles

I curled and popped up the umbrellas with a few layers of foam tape to make this a bird's eye view card. I did make an edge for the swimmers to rest their elbows on while they sip a drink and look out at the view. How does that sound with summer coming? I'm in!

See you soon...lots of posts scheduled!

-Carol

Monday, March 28, 2022

Love You More Than

I recently bought this stamp and die set and couldn't wait to use it. I don't know what I like more, the font for the sentiments or the cute dies!!! I wanted to make something other than a card, and I happened to see a sandwich board somewhere and pictured a white wood one in front of a restaurant with a cute saying. I always enjoy a cleverly written sign in front of a restaurant. This is what I came up with:


When I saw Color Throwdown #685 I thought I could make my stamp set work so I could join the challenge. I die cut the taco and put it together. Then I used the scalloped rectangle die that is included in the set to make the sign. I cut a card base of 3 1/2" x 5 1/2" and cut a partial square out of the bottom while the card base was closed to make the legs. Next, I got out a woodgrain cover die I have and ran my sign though for a wood texture. I am still designing something to make the sign stand without doing the "splits" and falling flat. LOL! I want the recipient of the card to be able to open it and read a written message inside from the sender...or maybe write on the back of the sign? We'll see. I would like to think that the person who gets this card would stand it on her desk at home or work, or maybe I could make these for cute place settings when I am making a Mexican meal for friends.

Products:

Concord and 9th: Love You More Than stamp set and dies

StazOn: Jet Black ink

Woodgrain cover die: Sorry, I don't know where I got it.

Hope you enjoyed this idea, and come back soon for more ideas with this cute set.

-Carol

Saturday, March 26, 2022

You Are My Anchor

I just couldn't wait any longer to use my Spellbinders Build a Summer Birdhouse dies designed by Vicky Papaioannou. Our latest Photo Challenge at Just Us Girls #625 gave me a good reason to make something with them. I like that you can take what you want from an inspiration and make it your own.


I had this patterned paper that I just love, and the die set that I'm equally crazy about, so it was an easy card to put together. The sentiment is from a new set I just got from my Favorite Things called You Keep Me Afloat. I used Versamark ink to heat emboss it with silver embossing powder.

I will be making more summer birdhouses as summer gets closer...can't wait! Join us this week with our photo as your inspiration!

-Carol

Monday, March 21, 2022

#HappyBirthday

I have been thinking about making a card with these gift bags for a while, and when I saw a new challenge late last week, I had a really good reason to sit down and do it! Then I couldn't post it until our daughter opened it on her birthday this weekend. In case you are wondering, inside I wrote the hashtag #noyouarenotgettingapupppy in my written message to her. (She's an adult and doesn't live with us, but would still love to get one if she or I didn't have allergies!) She loves to shop and likes all the things in the bags. It was a lot of fun going through my stash to see exactly what I could put in them for her. She also appreciates the work that goes into making a handmade card. I am playing along at Double D Challenges where Something with a Handle is the theme.


Products I used:

Waffle Flower Flat Paper Bag die

Poppy Stamps Whittle Dog die

Mama Elephant: Holiday Bitties (bottle)

Stampin' Up!: Flower dies and Balloon Bash Stamp set (sentiment)

Sizzix Summer Days Thinlits (sunglasses)

Simon Says Stamp: Bikini dies

Tissue paper

Silver mirror card stock

Prismacolor pencils (to color the bottles)

Pink and Main: sequins

(Sorry for all the pictures! I just never like the angles or depth perception in my photos.) First and foremost, I like to put foam tape behind my bags so they aren't flat...and the bags have lines on the side that you can fold to make the bags appear to be 3D. They look kind of real in person that way! I chose silver card stock for the handles, on the top of the bottles, and as lenses in the sunglasses. I left the flowers white because I didn't want to introduce any more colors on the card. It ended up being a lot of fun making her this personalized card with her favorite colors and the things she loves. I even made a slim box to put the card in so it wouldn't smoosh the bags! When I am making a card for someone I know well, I think about her/him the whole time I am making it. Do you? 

She absolutely loved her card and we spent the weekend having our nails done together, eating out, shopping and going to the beach. She had a great time! And when she saw the puppy in the bag on the card, she said, "Puppy?!!)

Be sure to check out the Double D challenge...they have unique challenge topics that are really creative! See you back here soon!

-Carol


Saturday, March 19, 2022

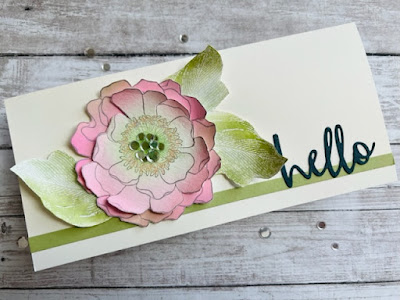
Hello - Ink Blended Flower

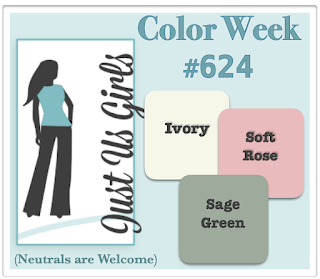
This week at Just Us Girls Challenge #624 it is Color Week, and we are using ivory, soft rose and sage green. I was worried that I wouldn't have card stock in those colors, so I got out some inks and blended away! I am also playing along with The Flower Challenge #66 because I used my last scrap of a nice textured watercolor paper (saved/hoarded for a long time) for the flower.


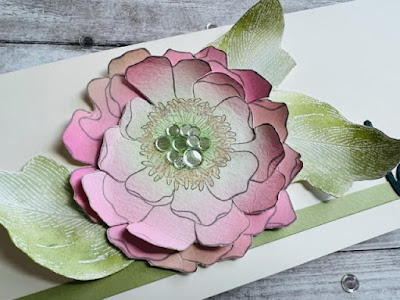
I knew I wanted to pop up the flower (Stampin' Up! Blended Bloom) and leaves (Magenta) instead of leaving them flat, so I started by making two flowers on my last piece of a favorite watercolor paper (thinking I would be watercoloring and because of its thickness) and three leaves on regular white card stock. I heat embossed the leaves with Versamark ink and white embossing powder, and for the flowers I ended up just stamping with Stampin' Up! Going Gray Classic ink. I decided to ink blend both flowers with distress oxide inks because my practice piece of watercoloring just wasn't pleasing me. For the center of the front flower I used Prismacolor pencil for the pink stamens and a tiny ink blending brush for the green.  On the second flower I just ink blended with pink and a little bit of green ink. I cut away the outer petals of the front flower so that the second one would show from behind, then bent the edges up like real petals. I added some sequins in the center of the front flower, then glued the two flower sections together. Next, I arranged my leaves and glued them behind the flower. After gluing the flower to the card front I popped up the leaves with foam tape and bent the ends up a little. I had a Hello die cut that was black, but ink blended white over it to make it gray like the ink in the flower. I cut a thin strip of green card stock for the card front and after attaching it to the ivory mini slimline card base, I added the sentiment on the right side.


We hope you will join us this week for our Just Us Girls Color Challenge! Check out all the inspiration from the Design Team!

-Carol

Thursday, March 17, 2022

Hoppy Easter!

There's a new board at the Tic Tac Toe Challenge #153 and I finally got out my Spellbinders Hoppy Sunday Drive die set! The triplets in the back seat are my favorite!!! I used the middle row from left to right: Die cuts, Coloring, Easter Bunny.


This card is interactive because the car wiggles and wobbles (I used and action wobbler behind the car) down the road. The tiny die cut pies take patience to cut out and piece together, but they are so cute that I couldn't stop adding flowers, carrots, robin's eggs and greenery. I apologize for the video. I have no luck with iMovie or my phone when trying to add a video.

Products I used:

Spellbinders: Hoppy Sunday Drive die set
Stampin' Up!: Green Galore and Coastal Cabana Classic Ink pads
Blender brushes
Inadvertently cut egg shaped cloud stencil (LOL) We'll pretend it was on purpose.