Tuesday, November 30, 2021

Fa La La La

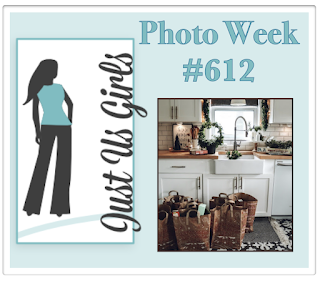
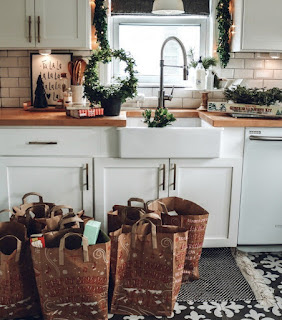
I love 3D projects and when I saw the Just Us Girls Challenge #612 I thought of making bags like the ones in their inspiration photo below, along with incorporating the Fa La La La, trees, stripes and snowflakes from it as well. I made a white bag like the Fa La La La framed picture  on the kitchen counter, and kraft bags like the ones on the floor of the kitchen.
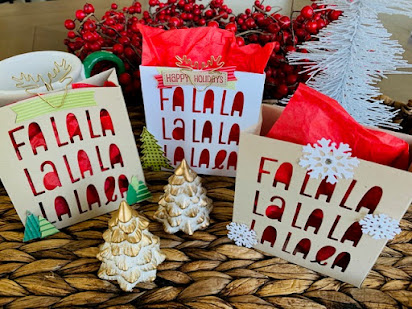


Then, while I was on a roll, I started making bags with doubled-sided patterned paper as you can see below. Once you've made one bag, it is easy to cut, score, die cut the sentiment and adhere the boxes together! I am thinking of adding acetate to the inside front of some of the bags so that candy or other gifts won't fall out the front.
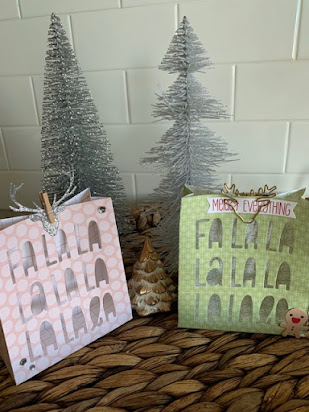


I found the right size bag that I was looking for from my all time favorite tutorial writer Sam of Pootles Papercraft here! My Fa La La La die fit perfectly on the one side of this bag. I die cut the Fa La La La out on one side of each bag then adhered the bag together. Next I just had to embellish each one. I stuffed some tissue paper inside and they were ready to go! Completed, they measure 4" W x 4.5" H x 1.5" D.

Products:

Stampin' Up Jingle All The Way stamp set

Hampton Art Stamp and Die set (large gold heat embossed/watercolored tree on white bag)

My Favorite Things Fa La La die

Tim Holtz Sizzix Christmas Minis dies (small die cut trees, gingerbread man)

Ellen Hutson Reindeer die

Stampin' Up! Reindeer clips and snowflake thinlit die (clips hold my bags closed)

Rhinestones here and there

Mini clothespins

I can see Valentine, Easter, 4th of July and birthday bags in my future crafting adventures! Check out Sam's video! Sorry I said Fa La La La so many times in this post! LOL!

-Carol


Monday, November 29, 2021

Merry Tree

Do you ever have a card idea in your head but think of it too late at night or when you are away from home? I finally put this idea to work and have a card to share with Happy Little Stampers Stencil Challenge Anything Goes here! 


This tree has been in my head for a while and I got the urge to make it late one evening...I am a morning person and don't know what got into me! I used a narrow striped Stampin' Up! stencil (taped off into a tree shape with washi tape) and some distress oxide and Stampin' Up inks in Twisted Citron, Cracked Pistachio and Green Galore to place the tree on my white cardstock panel. Then I got out my white GinaK Glitz Glitter Gel and spread it evenly and lightly over the fresh ink. At first it all looked yellow with no ombré effect and I was disappointed. Boom! The next morning it was dry, ombré and sparkly!

Next I took some Recollections Foil Paper (cardstock weight) and cut my sentiment with a Merry die. I liked the green effect in the foil and chose this paper for that reason. I scattered some holiday sequins (Stampin' Up!) on the panel and trimmed it down to be able to pop it up and show some green patterned paper behind it.

Just some hints about the Glitz Glitter Gel: The gel dries quickly, but I gave it overnight. The paper warped a little as it was drying so I put some acrylic blocks around the gel it to try to stop the warping as much as possible. When I put wide strips of foam tape behind the panel, the warping went away! I saw a video somewhere in which the woman tried this glitter gel over different types of ink pads (not pens!) and it really does take on the color of the inks used. It really was a simple, quick card. 

I wish you could see it in person because the sparkle is really nice. Have you already known this technique or do you buy the different colors of glitter gel? I figured that doing it this way saved me money for more stamps and dies! LOL!

See you soon,

-Carol

Thursday, November 25, 2021

Joy Love Peace

December is racing toward us and I am feeling the holiday spirit! I'd like to share my latest card for the Tic Tac Toe Challenge TTTC#141. I chose the left column moving down: Stitching, Wreath, Sparkle. I have had this wreath die forever and have only used it once before, even though I love it! Do you do that?!! I am entering my card to Happy Little Stampers Stencil challenge here as well.


Products used:

My Favorite Things Joy Love Peace stencil

The Greetery Postal Frame Die

Simon Says Stamp Ornament Wreath

Pretty Pink Posh Luau Jewels Mix

Distress Ink

Better Homes and Gardens template for the bow (Click here) I reduced it in size.

First, I die cut my lime colored panel.  Then I stenciled with white ink. I decided to do a shadow technique using teal ink to give a little extra detail to the stenciled words by putting it down just a little offset from the white stenciled words. Next I added the jewels that have so much iridescent sparkle! I popped up the wreath on foam tape for dimension and attached the bow to the card with glue dots. I imagine I will have to hand this card to the recipient in a larger than A2 envelope so that the bow doesn't get smashed down. It's the price you have to pay for a pretty bow!

Join us with this holiday season inspired board this week!!!

-Carol

You Bake the World a Better Place

Here is my last post as a Surprise Party Guest for Seize The Birthday and I must say it has been so much fun!!! What a nice team of ladies!! This week's topping is Hobby/Pastime. I thought about what that could mean for a card and made a list: sports, stamping, sewing, traveling, reading, cooking, BAKING! Here is my "baking hobby" birthday easel card since we all have that friend who is great at whipping up delicious recipes! She/He deserves a personalized birthday card! I am adding this to the NBUS challenge here because I have not used this stamp or top sentiment before!! 


Products used:

Stamping Bella Cakeabella (I just love her hair!)

Poppy Stamps Life is Sweet stamp set (top sentiment)

Stampin' Up! Party This Way stamp set (happy birthday sentiment)

Copic markers

Stampin' Up! markers

My Favorite Things Stitched Rectangle Scallop Edge Frames Die-namics

Blender brushes

See you soon!

-Carol


Wednesday, November 24, 2021

Joy

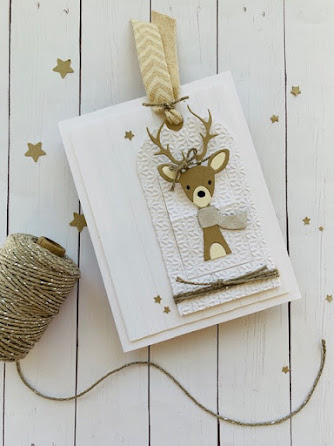
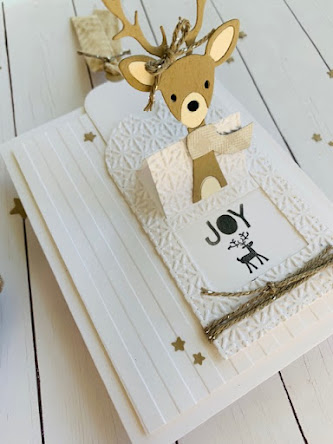
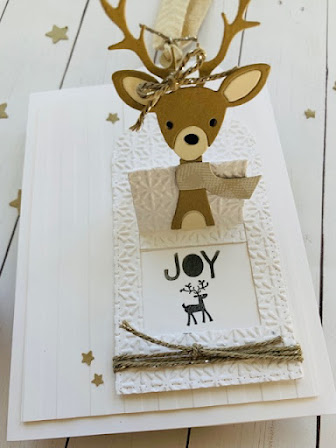
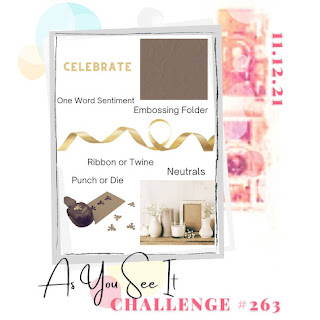
I stumbled upon a blog called As You See It and I'm playing along with their Challenge #263: Recipe for Celebrating Neutrals here as well as Simon Says Stamp Wednesday Challenge Anything Goes here. I think my favorite challenges contain a photo where you can interpret the challenge. Therefore, I made my deer a girl with her cute little bow and plaid scarf! I've always loved receiving interactive cards, and I like to make them often too! My sentiment is hidden inside the tag...it was masked off and stenciled. At the top of the tag when it is open, you could write To/From: or a message. I almost made the tag detachable as a tree ornament or to be able to use the tag on a gift!


Products used:

Simon Says Stamp: Picture Book Deer die, Intense Black Ink, Peace Joy Hope Love stencil

Stampin' Up!: Snow and lined embossing folders, patterned paper, star border punch, striped ribbon, Make a Mitten stamp set (tiny deer inside)

Studio Katia: Slider Tag Die

Twine

White Cardstock


Hope my card made you smile today! Happy Thanksgiving tomorrow!

-Carol


Sunday, November 21, 2021

Advent Calendar Boxes

I have a fascination with Advent calendars and have wanted to make different types of them over the years. Currently I'm making a variety of little boxes to go with my recent advent calendar right here! After opening a door on the Advent calendar, the recipient will see a number, then go to the little boxes I've made and open the one with the corresponding number!

I am playing along with Happy Little Stampers Christmas Challenge Anything Goes right hereAll you need to make these little cuties are double-sided patterned papers, a paper cutter, a bone folder, a hand held small hole punch and ribbon. I also used red line tape (sticky strip) for the milk carton tops.


Two of the box tutorials are by Sam at Pootles Papercraft here called Milk Carton Topper Box (also here for a traditional milk carton). The kind-of diamond shaped ones are by Conibaer here, not in English, but just know that you need any size square of sturdy patterned paper or lightweight cardstock. I made 5", 6", 8", 10" and 12" and my favorite size is the 8"  but it really depends on what you need to fit inside! Also, do the corner folds (starts at 3:22 here) in all four corners along the diagonal lines. 

I put a little one on a Christmas place setting and may use this idea this year...with a little candy inside. I got the wooden tags a long time ago and do not remember who makes them. Sorry! I had been saving them for a special use and this is just that project! 

Hope you check out the box tutorials and try them. You can watch a movie while making them! They don't take long and once you learn the folds, you can make them without directions in front of you!

See you soon,

-Carol

Thursday, November 18, 2021

Fa La La La

I saw the Color Throwdown #ctd669 colors this week and HAD to make something using the gorgeous colors of navy, gold and white! My home is mostly navy, grey, white, silver and gold, and these colors made me really want to get gold, navy and white wrapping paper this year...probably won't find them, but it's an idea! Here is my tag using those colors. Can't wait to put it on a pretty package! And as with the last time I used these dies, I can't stop shaking it and making the legs swing!


I cut my own tag, then lightly ink blended Archival Ink's Cobalt on with one of my new Hero Arts Graphic Patterns stencil pairs. I cut out and paper pieced the gift girl and her packages, having fun mixing and matching all the colors and patterns. I grabbed some older Stampin' Up! ribbon and my good old standby Reverse Confetti tag reinforcement (decorative circle) die for the hole in the tag. The sentiment is The Stamp Market Candy Cane Christmas set. (My photography on this rainy day makes the navy look black, unfortunately.)

Hope you are getting lots of crafting time! I'll be back soon with more tags for this year's packages!

-Carol