Wednesday, June 8, 2022

'Tis the Season

We are back at Christmas Craft Creations this month with a new theme: Trees! Ever since I was a child Christmas has seemed magical.  I have read that many of us have that feeling because it is how our parents treated the season when we were children and made it that way for us, which is definitely true in my case. This little deer in the woods seems like it is feeling the special season. I am also sharing my card over at Happy Little Stampers Christmas Challenge here.


I love birch trees whether they are bare or with leaves, and the cards I have seen using them bare like this are especially pretty! So I inked up a panel with a variety of blues, purple and white, then watered down some white acrylic paint and spattered it over the panel to look like light snowfall. Then I ran the panel through my Big Shot to get the stitching around the edge. 

I die cut the trees and remembered, after adhering them flat to the panel that I had originally wanted to pop them up on foam tape. (Luckily I had already put my moon behind the trees on the left!) I painstakingly added three more trees on foam tape (skinny little pieces due to the narrow trees and branches). I stamped the deer, then added the snow bank in front of him, again on foam tape. I didn't want to disrupt the scene with an added sentiment on a separate piece of card stock, so I stamped it right on the card. 

I hope you will join us this month and make a Christmas card where trees are in the spotlight! I know that with every card I make each month for this challenge I am adding to my stash of cards to give out come December!!

Products I used:

MFT: birch trees dies

SugarPea Designs: Card Front Element Builder die (front panel)

Stampin' Up!: deer stamp

Stazon: Jet Black Ink

Ellent Hutson: sentiment

Simon Says Stamp: Drifting Stitches Borders die (snow)

A variety of inks, including distress oxides

Delta white acrylic paint

Foam tape

Tacky Glue


See you soon,

-Carol

Sunday, June 5, 2022

Hi Friend

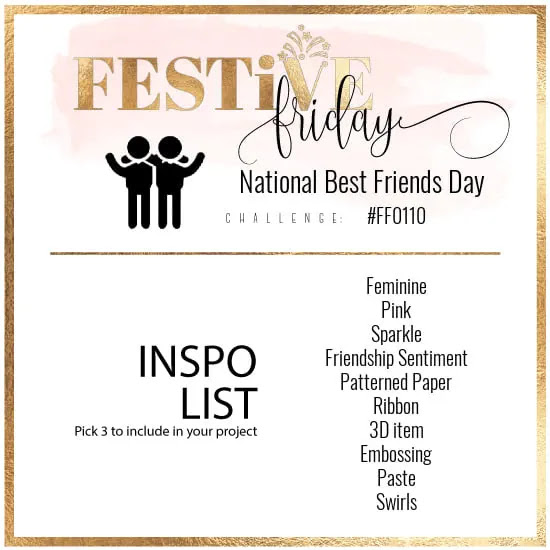
When I saw the Festive Friday National Best Friends Day (June 8th) #FF0110 Challenge here I had to join. I recently caved and got these two stitched letter dies from Spellbinders. I just got the Pinwheel Party Stencils from The Greetery and had to try them out right away! 


From the list above I integrated feminine, pink, sparkle, and friendship statement onto my card. I used Distress Oxide inks, DMC silver embroidery floss, rhinestones, glue dots, ink blending brushes and a "friend" stamp from Tim Holtz. I used just 4 strands of floss so it wouldn't be too thick going through the center dot several times. Silver floss is fussy and hard to work with, but I took my time and it all worked out! I added tiny rhinestones to every other embroidered "asterisk" so it wouldn't be overly blingy. The embroidered letters are attached to the shadow letter with glue dots. 

Hope you like it! I am trying to resist buying more of these letter dies yet but scheming how I can make words without buying tons of letters. The Spellbinders website has ideas for words with them. I'm warning you...their samples and the samples on Yana Smakula's blog are very tempting!!

-Carol

Saturday, June 4, 2022

National Iced Tea Month: June!

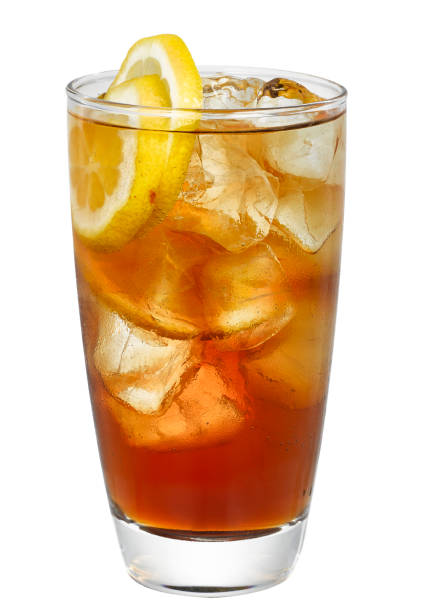
I am participating again in the National Wacky Holiday Hop over on Instagram. (Please be sure to go see my account https://www.instagram.com/sawithadtomakeit/ for the links to all the cardmakers in the hop!) For June, I chose National Iced Tea Month! As I type this I am sipping on a cool glass of Arizona Iced tea (Arnold Palmer: iced tea/lemonade) ! Here is a little history on this refreshing drink from the National Day Calendar website.


I used an older (1991) wooden stamp by Stamp It! for my drink as well as Prismacolor pencils to color it! (I didn't realize how many colors/shades are in a glass of iced tea! It is very orangey with a variety of browns and a little yellow! Look at the picture below that I used when coloring my images) I had to use this patterned paper that I adore...it just screams SUMMER! I added a little grey colored pencil beneath each glass for shadows, and created the sentiments on my computer to finish the card!! We hope you will join us over on Instagram today, June 4, to see all the fun and wacky holidays our card designers chose to celebrate!


 Make you thirsty? Me too! See you soon,

-Carol


Awesome Day

We are back with Just Us Girls #635 Word Week and Lisa E. has chosen "Paintbrush" as our word! I just got the Spellbinders Artful Tulip die set so I couldn't wait to use it!! Check out Lisa's card with the same die I used...AMAZING! I told her to frame hers!


Products I used:

Spellbinders: Artful Tulip

Ellen Hutson: Good Day to Sparkle 

Stampin' Up!: Reinkers in Pink Passion, Pool Party and Orchid Opulence, Rich Razzleberry ink pad

Watercolor paper

Silver card stock

Wood grain card stock

Sequins

Foam tape

I watched You Tube videos and looked at lots and lots of cards made with this die set on Pinterest. I decided to use a watercolor technique on watercolor paper that I saw Lisa Curcio use on her blog here. I was excited to try it because I don't own alcohol inks, which is how I usually see this technique done. 

Next I die cut the bristles and flowers from the card stock that I watercolored after I dried it with my heat gun. I did her technique again on the diagonal of a panel of watercolor paper about the size of an A2 card. I added a little spatter of ink colors to the panel next. 

After everything was dry I die cut and assembled the paintbrush and tulips, then played with where I wanted them on my panel. (It was kind of fun to decide how to make the handle and parts of the brush. I went with woodgrain card and silver card stocks.) I used foam tape and Tacky Glue to adhere everything to the panel. Since I used silver card stock for some of the tulips and leaves, I chose and stamped my "sparkle" sentiment, then cut the two pieces out by hand and attached them to the panel with foam tape. For more sparkle I added some sequins! Last, I matted the panel with fuchsia card stock, then attached it to an A2 white card base.

That's it! I have another paint brush card coming very soon, if it turns out like I envision it. Check back this weekend for that card! Check out our design team's fun ideas for "paintbrush" this week and join us!

-Carol


Saturday, May 28, 2022

Thanks So Much

Hi there friends! It's my turn to host the Just Us Girls Photo Challenge #634 this week! I chose this photo because a) it is almost summer and b) I love all the elements in it that you can take to make a card, tag or other project! A bike, flowers, a basket, the colors, or a combo of some/all of those things! Here is what I came up with, followed by the challenge photo. I am also entering it over at Happy Little Stampers Anything Goes with Dies here, Simon Says Stamp Anything Goes here and Time Out Challenges #214 here.


Products I used:

HoneyBee Stamps: Riding By Stamp set

My Favorite Things: Palm Tree dies

The Greetery: Postal dies

Hero Arts: tropical flower

Handmade cloud stencil

Flora and Fauna: Shell stamps

Distress Oxide inks

Ink blender brushes

I started by taking the color of the VW van in the photo and converting it into the idea of an ocean and beach...so then I knew I would have to add palm trees! Since it was becoming a beach scene, I had to give it a postcard look with my postal dies. I cut a cloud stencil by hand and ink blended the sky, then masked off the water and sand portions, ink blending each separately. I die cut the bike, basket and its contents, and put it all together. Then I built the scene. Fun!!!

Hope it made you smile and get that summer feeling going!

-Carol


Thursday, May 26, 2022

You Put the Sun in Sunshine

For our latest Tic Tac Toe Challenge #163 created by Design Team member Silke, I tried out my new, long awaited Gladys die set!!! I've wanted her forEVER and finally decided to make the purchase!! I looked it up and learned that flamingos are wading birds, so I made believe that Gladys and her little ones are walking/wading on the winding shore. From our board I decided to use the first column: Sun, Birds, Thank You. I am also entering my card in some other challenges below where Gladys fits the theme/inspiration this week!


I happened to see this amazing stair step card recently by @itsacardknocklife on Instagram. Isn't it cool?!! I thought it would showcase Gladys well.


I searched for a tutorial and used this 5" x 7" size card by Sam Calcott of Mixed Up Craft here and then got busy decorating the card base. I added a little ink blended shading along the edges of the flamingos. The only "tricky" thing I did was use washi tape to extend the run's rays longer/higher for stenciling in order to fit the card panel.


Products I used: 

Sizzix/ Tim Holtz: Gladys die set

Poppy Stamps: Whittle Flamingo die set

Simon Says Stamp: Drifting Stitches Borders (stitched waves)

Stampin' Up!: Beach Happy Stamp Set (Sentiment)

My Favorite Things: Beach Cutie (sentiment)

Tim Holtz: Sun stencil

Distress Oxide Inks

Blending Brushes

I also decided to enter it at Happy Little Stampers Anything Goes with Dies here,  Time Out Challenges #214 Word Prompt: Sunshine, as well as the Simon Says Stamp Wednesday Challenge here.


We hope you will join us this week with this very original, fun board!

-Carol


Saturday, May 21, 2022

Beach Happy

I am already in summer mode and thinking beachy cards. This week at Just Us Girls Challenge #633 it is Color Week: Coral, Blue, Tan. I went for a water feel with my iris effect card, which I have made a couple of times before here and here. I learned this technique from Debby Hughes here. Hope you like it!


As you can see, I tried patterned paper this time with water prints. I also used some aqua vellum because it seemed "watery" to me too! I enjoy this technique so much...it is a little like putting a puzzle together. I try to use all of my papers more than once but not let the same patterns be right next to each other. I ink blended my already coral fish with distress ink in Abandoned Coral to give some shading. I added the rough twine for the tan element and a rope/beachy texture.

Products I used:

Poppy Stamps: Whittle Fish Trio

Stampin' Up!: Beach Happy stamp set

Archival ink: Cobalt

Ranger Distress Oxide: Abandoned Coral

Patterned papers and vellum

Twine

We hope you will join us this week for this pretty color combo! You are sure to be inspired by the variety of great ideas the team came up with, each completely different.

-Carol